Table of Contents
'Owling Granny
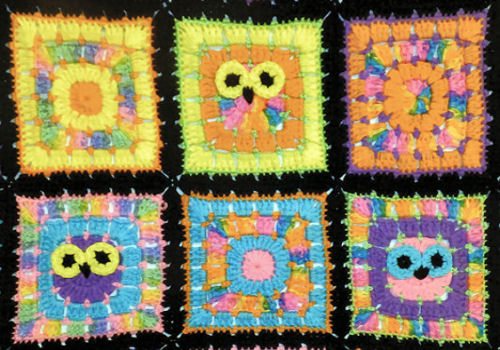
I am pretty sure this was the first granny square blanket I made. So firstly here is a sample of what it looked like after I had stitched it together. And the reason it's only a sample is because like I said, these pictures were taken for my reference and this one was in the worst-lit room in our abode.

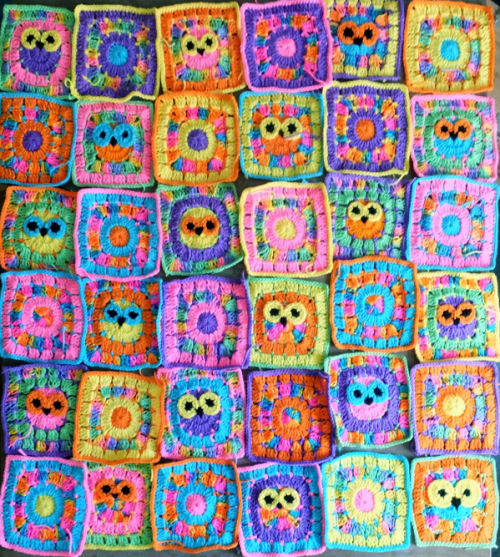
I did manage to get one pretty good picture of the blocks, though, as I had laid them out on a table to decide how to position them. If after looking at that you decide you might want to start stitching such a thing the instructions start directly below.

This is another great stash buster project and I used up scads of small pieces and partially used skeins of yarn in it. Each block follows the same pattern but for some the two center rounds are made the same color to use for the “owl”. Each owl uses about 4 to 5 grams of yarn. The rounds outside of the center two are simple box stitches.
Suggested hook size I; Yarn needle required for sewing eyes, beak; and blocks together.
Owl Body
Rnd 1: Ch 4 (starting st + 1st dc), dc 15 times in starting st (total 16 dc), sl st into top of ch 3 to close.
Rnd 2: Ch 3 (first dc of this round), 2 dc in first 15 dc around, and the next dc will count as the 2nd with the Ch 3 for a total of 32 dc.
(End owl)
For non-owl blocks, repeat the above two rounds but change colors after the first round.
Rnd 3: (Color 2) With SC attach next color in the sp between the last dc and the starting ch 3 of the previous round. *Ch 4, skip 2 dc, sc in next dc sp (corner), [ch 3, skip 3 dc, sc in next dc sp] twice*, repeat * to * three times; sl st in space just before ch 3 dc of Rnd 2. Finish off.
Rnd 4: (Color 3) Sl st into corner space. Ch 3 (first dc), 2 dc, *ch 2, 3 dc (corner), ch 1, 3 dc in ch 3 sp, ch 1, 3 dc in ch 3 sp, ch 1, 3 dc in corner sp,* repeat from * to * for next two sides, then start repeating on the fourth side but finish off with a sl st to the original ch 3.
Rnd 5: (Color 2) SC attach in corner, ch 2, sc in corner, *ch 3, sc in ch 1 sp 3 times, ch 3, sc in corner sp, ch 2, sc in corner*, then repeat from * to * 3 times but instead of sc in last corner, sl st to the first ch that started the round, tie off.
Rnd 6: (Color 2 or 4) Sl st new color into corner, ch 3, 2dc, ch 2, 3dc in corner, ch 1, 3 dc in ch 1 sp, and continue on around the block in the same fashion as Rnd 4 until finishing with a slip stitch in the 3rd ch of the first of the round.
Rnd 7: (Color 2) SC attach in corner space, sc ch 1, 2 sc, *sc in each st across, repeat corner, repeat from * around piece until final connect with sl st.
Rnd 8: (Contrast color for border) Sl st into corner ch, Ch 3, 1 dc, ch 1, 2 dc in corner; *dc in each of next 3 st, ch 1 across to next corner; 2 dc, ch 1, 2 dc in corner, repeat from * around whole piece, sl attach to original ch 3.
Eyes
*Eyes: I like making them a little different.
(Pupils) With black yarn ch 2; in 2nd ch from hook make 6 sc and connect to original sc with sl st. and finish off.
(Iris) Sl st attach the color of yarn for the iris to one of the sc in the pupil. Ch 2, hdc in 1st sc. Hdc twice in each of the five sc after that (a total of 12 sc), attach to 2nd of original ch with sl st and fasten off. Leave a long enough tail for sewing the eyes to the owl. As a rule of thumb, 1.5 to 2 times the length of around the object to be stitched on will leave plenty to work with, so in this case six to eight inches will be plenty.
*Eye variations: Use a smaller hook for smaller pupils, larger hook for larger; use dc instead of hdc for iris (although it’s better to stitch 14 dc into the pupil (it’s easily done using the end sl st as a seventh stitch).
Finish
Once all blocks are satisfactory finished (I also like to bury ends before the connecting starts), begin stitching them together using your preferred method (I usually favor a whip stitch to avoid the odd seams made by sl st.) Afterward begin at one of the corners with the contrasting color to make a border around the whole thing. For this blanket I recommend at least one solid dc round.